
You’re here because you run a Shopify store and want to get some basic web analytics installed – good for you! While Google Analytics 4 would not be my favorite choice for most e-commerce analytics use cases, eg funnels , performing landing pages and user-id research, let’s get to it.
While usually one would install GA4 via Google Tag Manager, in the context of Shopify it is not officially recommended. Instead Shopify’s control panel has a separate settings page to install GA4 directly. This lets Shopify send e-commerce data to GA4 directly, an extra layer of data for tracking SKUs, prices and attributes common to e-commerce.
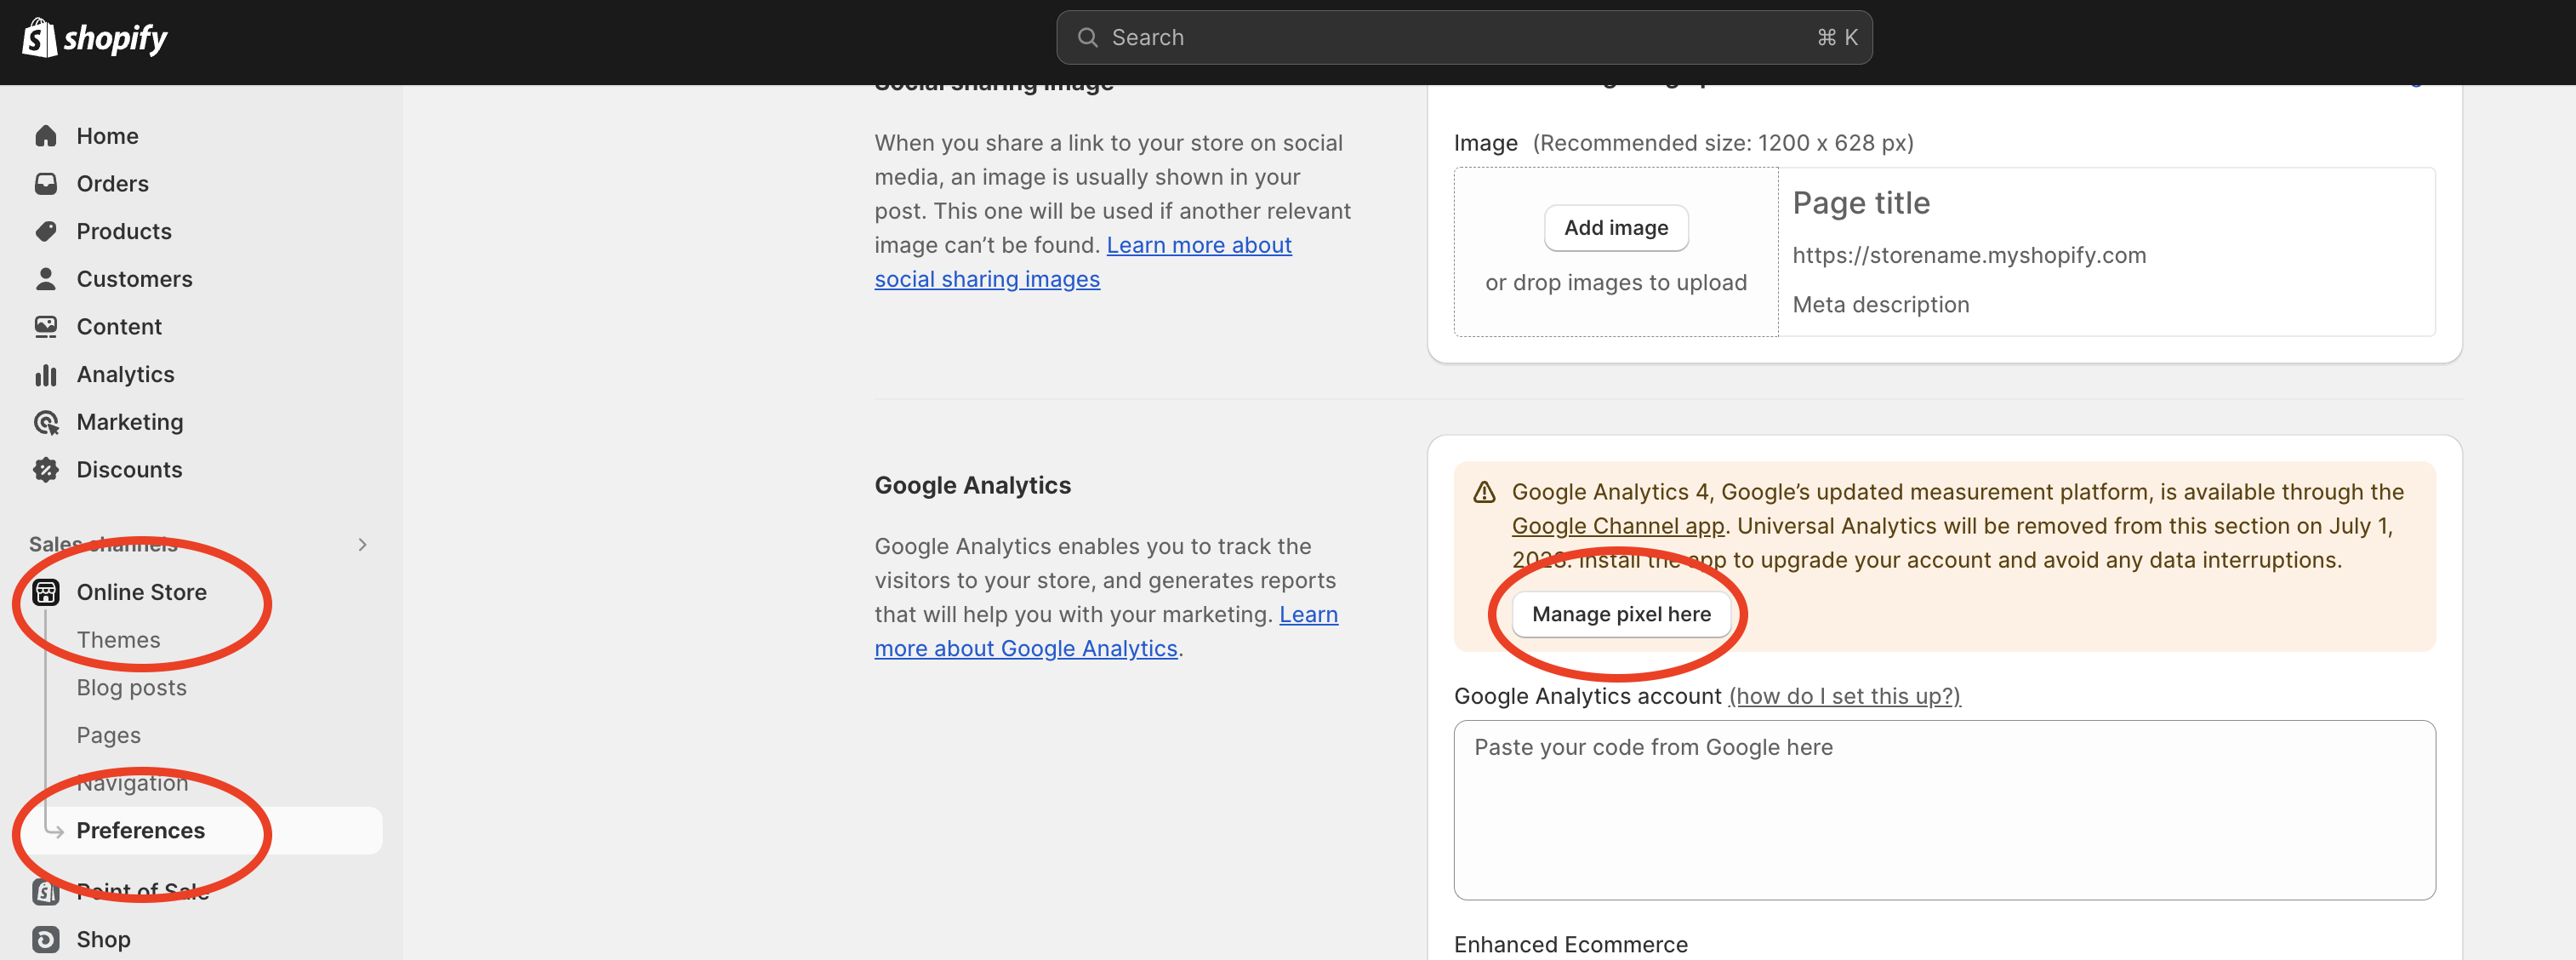
To reach this menu, click 'Online Store' followed by 'Preferences' on the left hand menu in your Shopify store. If you scroll down on the right, you will find a section for Google Analytics as show in the image above (at the time of writing, early 2024). Click 'Manage pixel here'.
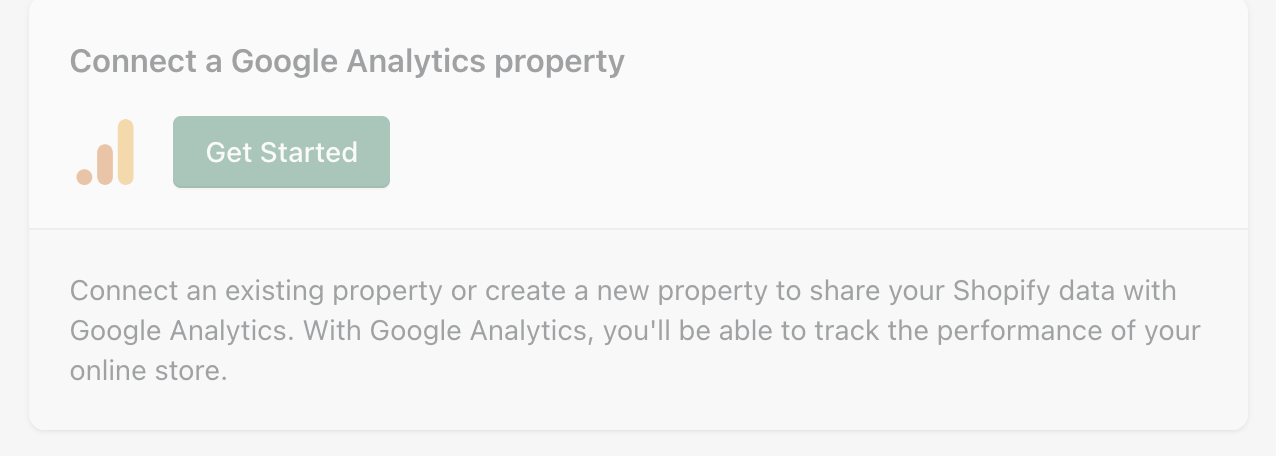
Connect you Google Account that is linked to your GA4 property, then click 'Get Started' on 'Connect Google Analytics' property and follow the instructions.
That’s it!
GTM Shopify Integration
As above, Shopify does not recommend integrating GA4 via GTM (Google Tag Manager). But say you need to install GTM for a business reason, we’ll now look at this.
Set up a Google Tag Manager container if you have not already – and get the tag ID. It looks like this: GTM-XXXXXX which is available in the container settings of GTM within multiple screens. Here is an example below:

GTM Shopify Integration: The Recommended Way
You can make use of Shopify’s ‘pixels’ function to install GTM.
Log in to your Shopify admin panel.
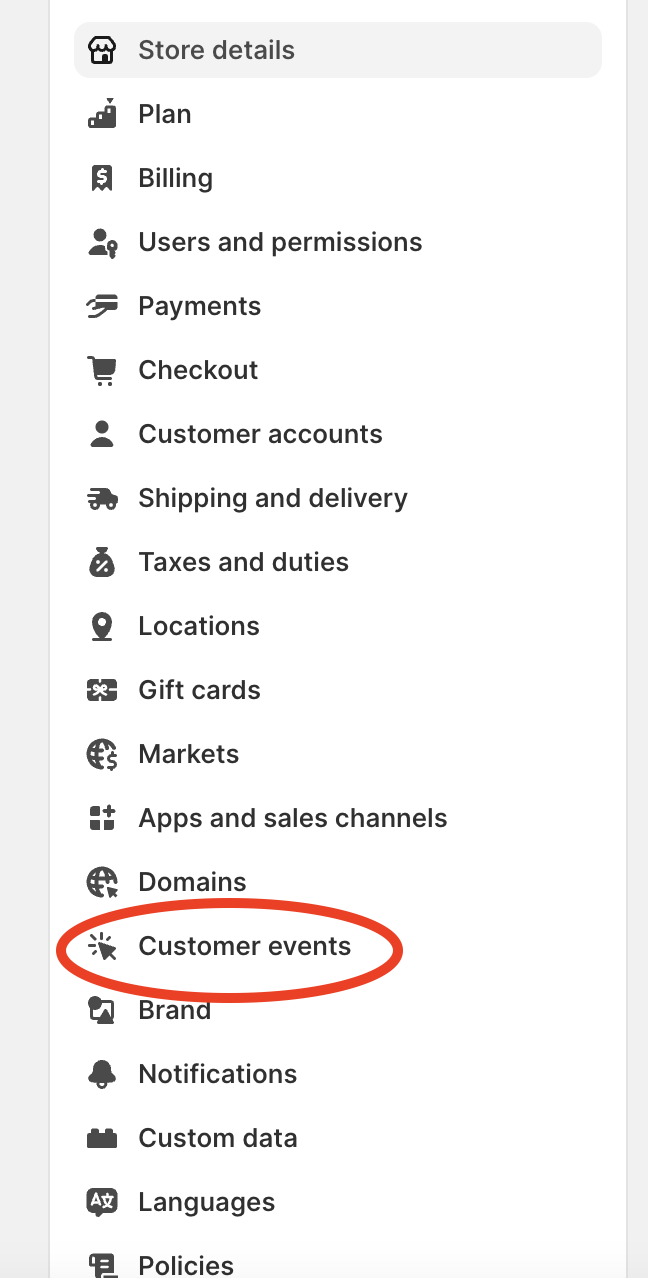
Under your store ‘settings’ on the left menu panel, click ‘customer events’. Click ‘add custom pixel’ and name the pixel something like ‘GTM’ or ‘Google Tag Manager’. Call it whatever you like.
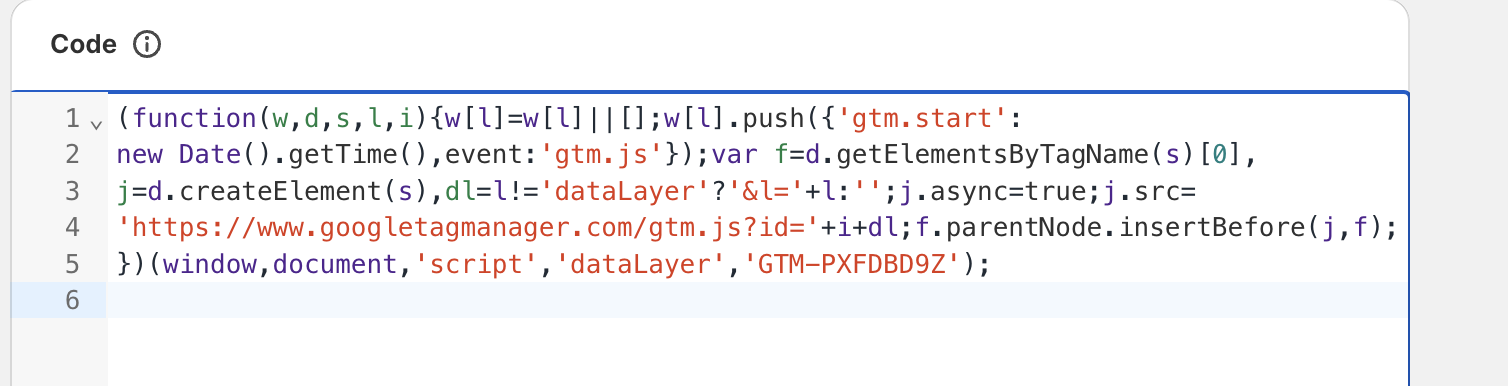
At this stage you will be asked to paste in the first GTM snippet, which looks like the below from the GTM instructions
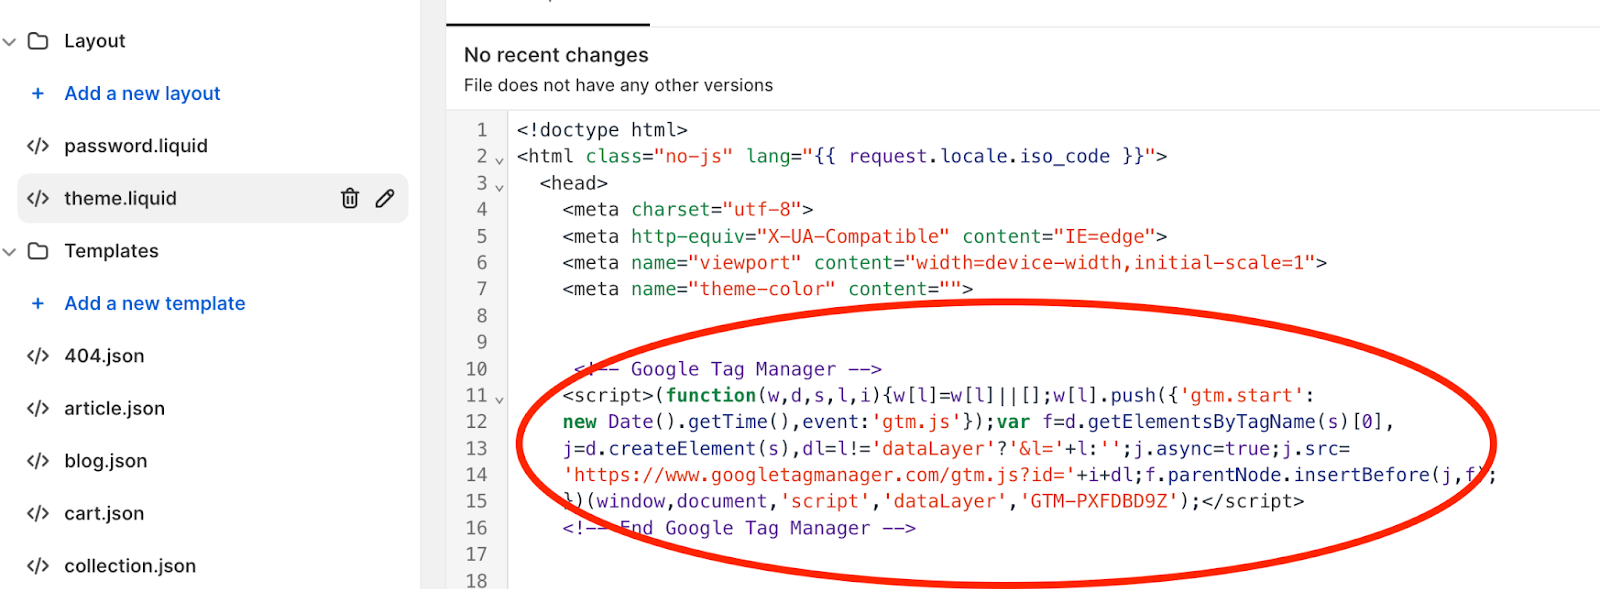
<!-- Google Tag Manager -->
<script>(function(w,d,s,l,i){w[l]=w[l]||[];w[l].push({'gtm.start':
new Date().getTime(),event:'gtm.js'});var f=d.getElementsByTagName(s)[0],
j=d.createElement(s),dl=l!='dataLayer'?'&l='+l:'';j.async=true;j.src=
'https://www.googletagmanager.c...'+i+dl;f.parentNode.insertBefore(j,f);
})(window,document,'script','dataLayer','GTM-PXFDBD9Z');</script>
<!-- End Google Tag Manager -->
But you will need to extract the javascript from the above snippet. You can do this by extracting everything in between (but not including) the <script> and </script> tags.
You can also ask ChatGPT to ‘extract the javascript from the above GTM snippet’:
Shopify have provided a guide on how to do this all here.
I note here one disadvantage of this ‘customer event’ or 'pixel' method of installing GTM: many of GTMs triggers will not work as expected. As code within the 'customer event' tab runs in Shopify’s ‘sandbox’, for security reasons scroll triggers, click triggers (outside of what Shopify supports within its settings), DOM visibility triggers and other automatically detected GTM events will probably be blocked.
Google Tag Manager Shopify Integration: Theme Editing (Not Recommended Way)
You can install GTM via editing the Shopify theme files directly. But this is not recommended because (as of late 2023) you do not have access to the checkout.liquid template file – which means you cannot install GTM on your checkout flow. For an e-commerce store this is surely one of the main areas of the site where you may want some analytics in place. There are workarounds but these essentially end up repeating the steps in the above section, which makes editing the theme files redundant, or worse, duplicative, resulting in two sets of data being broadcast for a single event. The upside of installing GTM via the template.liquid file however is that because you're not using Shopify's sandbox, all GTM triggers (scroll, click, DOM load etc) will work normally.
Nonetheless, to do this:
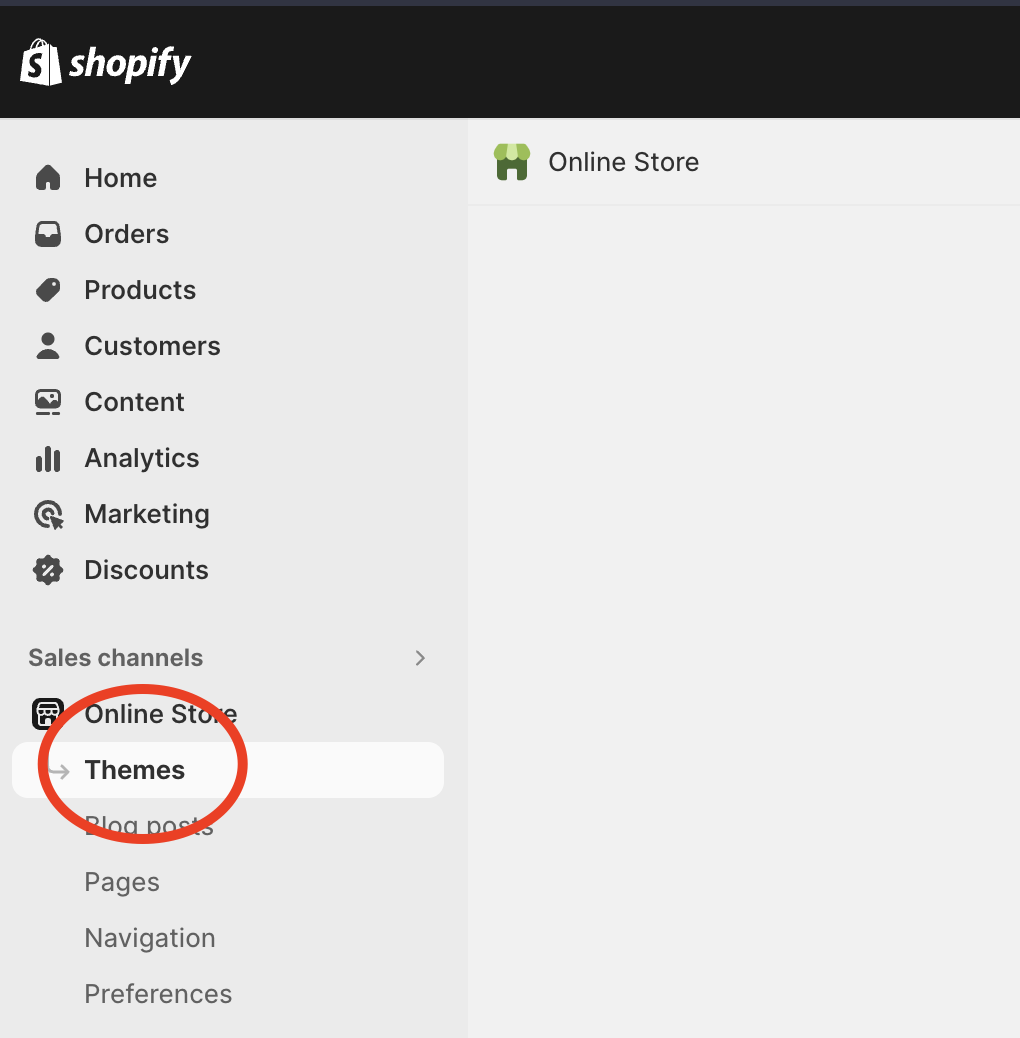
Go to "Online Store" and then "Themes".
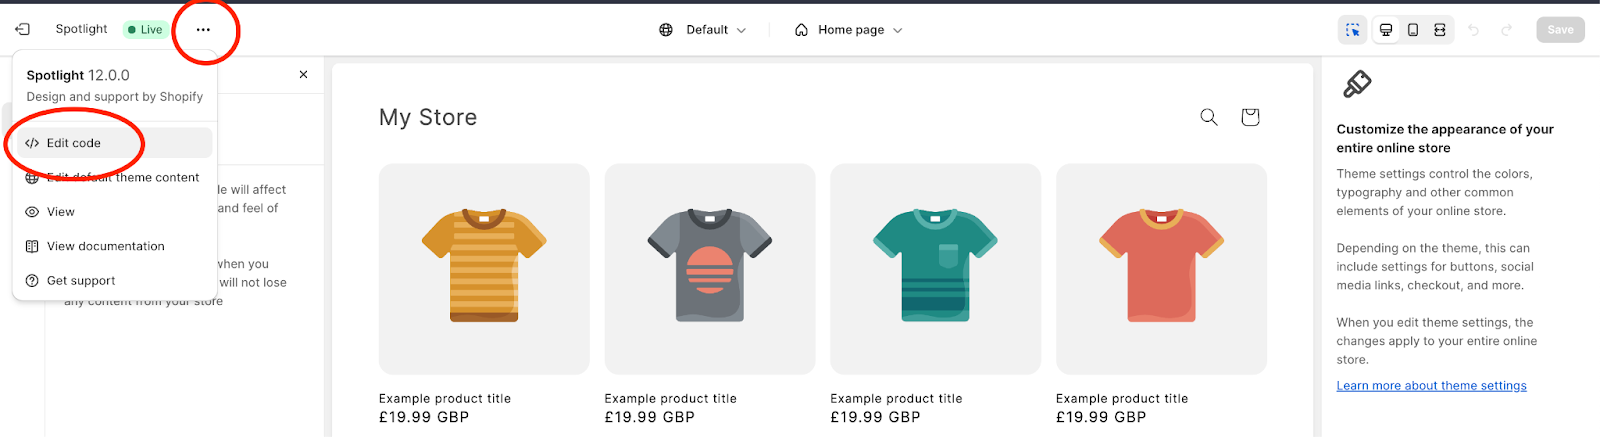
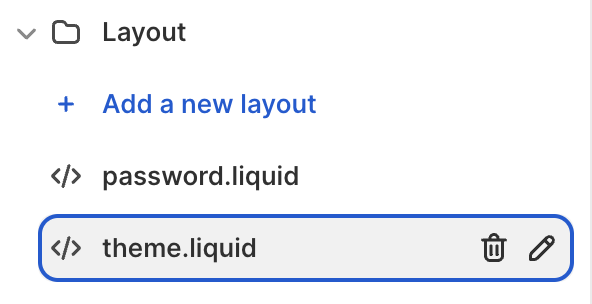
Find the theme you want to edit and click on "Actions", then "Edit code". You’re now in the theme editor where you can paste code in. Find the theme.liquid file.
Insert GTM Code Snippets:
You need to insert two GTM code snippets into your Shopify theme: one in the <head> section and another in the <body> section.
For the <head> Section:
Paste the first part of the GTM code just after the opening <head> tag – the installation code that begins with ‘<!-- Google Tag Manager -->'
Next, staying in the theme.liquid file, paste the second part of the GTM code immediately after the opening <body> tag.

Once you have inserted both parts of the GTM code, save your changes.
Adding Tags in GTM
Once GTM is set up on your Shopify store, you can start adding and managing tags through the GTM interface. You can install GA4 via GTM following Google’s guide here.
Remember that making changes to your theme's code can affect your site's functionality. If you're not comfortable with editing HTML, get in contact.
